Hi,
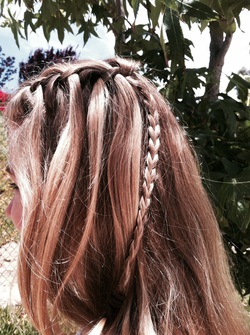
Today I'm going to show you how to do a waterfall braid. I love the look of this braid. The cascading (hence the name waterfall braid) pieces of hair give it a dramatic flare that adds to the hairstyle. I chose to finish the hair off with a braid, but you can just bobby pin the ends. A little bow at the end would also look really cute. Taylor will be my model. Lets get started!
First you want to part your hair to one side or just straight down the middle.
<3 Ellie
Today I'm going to show you how to do a waterfall braid. I love the look of this braid. The cascading (hence the name waterfall braid) pieces of hair give it a dramatic flare that adds to the hairstyle. I chose to finish the hair off with a braid, but you can just bobby pin the ends. A little bow at the end would also look really cute. Taylor will be my model. Lets get started!
First you want to part your hair to one side or just straight down the middle.
- At the top of one side of your head, you want to take a medium size chunk and split it into three. It is important to leave some hair hanging down to even out both sides of your head.
- Next, you want to do one stitch like a regular braid. Right strand over middle, left strand over middle.
- Now this is where it gets tricky, you are only going to add hair at the top. Take a small chunk of hair and add it to the top strand. Cross it over to the middle.
- Then you are going to take the bottom strand and cross it over the top strand which is now the middle strand.
- This next step is very important: You want to take that top strand, now the bottom strand and drop it. Or if you are doing it on someone else, have them hold it. This is how you get the waterfall effect.
- It will look like that piece of hair is just falling through the braid.
- You will want to repeat steps 4-6 all the way to the back of your head.
- Secure hair with a bobby pin, or finish off with a braid like I did.
<3 Ellie
 RSS Feed